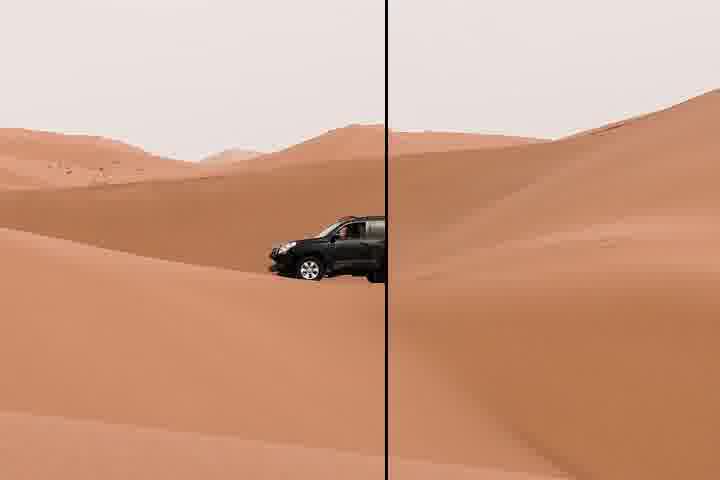
Sometimes, a perfect photo is ruined by an uninvited guest. Maybe it’s a distracting background element or a photobomber creeping into your frame. It could even be undesirable blemishes or stray objects tarnishing an otherwise flawless image. Regardless of the culprit, learning how to clean up your images easily and effectively can save your picture-perfect moments.
With image cleanup tools,Remove Unwanted Objects doesn’t have to be a job reserved for Photoshop experts. This guide will take you through why image cleanup is essential, how to use our cleanup tool, and tips to achieve the best results with minimal effort.

Table of Contents
Why Image Clean-up Matters
When it comes to visual content, every detail matters. A single distracting element can draw the viewer’s attention away from the subject of your image, impacting its overall quality and effectiveness. This can make a significant difference, especially for professionals like content creators, product photographers, and marketers who rely on visually compelling material.
But beyond the professional realm, even casual photographers benefit from clean photos. After all, every shared photo tells a story, and every distraction dilutes its impact. Whether you’re polishing social media posts, enhancing personal memories, or perfecting a client deliverable, image cleanup ensures the visual harmony your photos deserve.
Common Unwanted Objects in Photos
Unwanted elements can take many forms, depending on the context and setting of your picture. Some of the most common offenders include:
- Background clutter (stray wires, trash bins, or other distractions).
- Strangers or photobombers in public settings.
- Reflections in mirrors or windows.
- Unwanted text or logos obscuring the focus of the image.
- Accidental shadows, glares, or watermarks.
Fortunately, advanced image cleanup tools are designed to tackle these challenges with precision and ease.
Step-by-Step Guide to Using Our Image Cleanup Tool
Our image cleanup tool is designed to make removing unwanted objects as simple as possible. No prior experience with photo editing is required! Follow these steps to transform your pictures in just a few minutes:
Step 1: Upload Your Image
Start by uploading your image directly from your device. You can drag and drop the file into the tool or click the “Upload” button to browse your gallery.
Step 2: Select the Area to Clean Up
Use the intuitive selection tool to outline the unwanted object. Whether it’s a person, logo, text, or shadow, simply highlight the area with your mouse or touch screen.
Step 3: Preview Suggested Edits
Once the selection is made, the tool will automatically analyze the surrounding areas and generate a suggestion that blends seamlessly with the content around it. Click “Preview” to see the results.
Step 4: Refine (If Necessary)
If automatic cleanup isn’t exactly what you like, adjust the selection or fine-tune the results using additional customization options. You can tweak colors, brushes, or erasure intensities to achieve the perfect edit.
Step 5: Save and Share
Once you’re happy with the results, click “Download” to save the final version. It’s now ready for printing, sharing, or uploading to your favorite platform.
Tips for Achieving the Best Results
To ensure professional-quality edits, keep the following tips in mind:
- Work With High-Resolution Images
Higher resolution provides more pixels, giving the tool more information to work with and ensuring cleaner edits.
- Be Precise With Selection
Use fine strokes when selecting objects to make sure you only target unwanted elements and avoid erasing details you want to keep.
- Use the Zoom Feature
Zoom in on smaller areas to refine your selection more precisely. This is particularly helpful for images with intricate foregrounds or backgrounds.
- Match the Scene’s Lighting
Lighting and shadows play a significant role in creating seamless edits. Adjust these elements when possible to ensure smooth results.
- Double-Check for Subtle Artifacts
Before finalizing, inspect the area you’ve cleaned to ensure there are no noticeable inconsistencies or leftover marks.
Advanced Techniques and Use Cases
Beyond basic photo cleanup, advanced users can explore these powerful applications:
- Product Photography
Remove distracting elements like smudges, labels, or reflections for high-quality e-commerce listings.
- Social Media Content
Polish your Instagram photos by erasing unwanted bystanders in highly trafficked areas.
- Document Restoration
Clean up tears, stains, or faded text from scanned historical documents.
- Creative Manipulations
Use the tool to alter image compositions, such as removing a person from a group photo or changing a cluttered background into a blank canvas.
Why Choose Our Image Cleanup Tool?
Compared to traditional editing software like Photoshop, our tool focuses on simplicity without compromising quality. Here’s how it stacks up:
| Our Tool | Traditional Editing Software |
|---|---|
| User-friendly, no experience needed | Steep learning curve for new users |
| Affordable pricing | Expensive one-time or subscription cost |
| Fully online (no downloads) | Requires local installation |
| Quick and automated cleanup | Manual and time-intensive editing |
Our tool ensures anyone—from casual users to professionals—can edit like an expert, no matter the complexity of the task.
Perfect Your Photos Today
With our image cleanup tool, perfecting your photos has never been easier. Whether you’re a social media enthusiast looking to elevate your feed or a professional needing polished visual assets, our tool delivers stunning results in minutes.
Why wait? Try it for yourself and see the difference clean, distraction-free images can make.
Privacy Policy – Privacy & Terms – Google